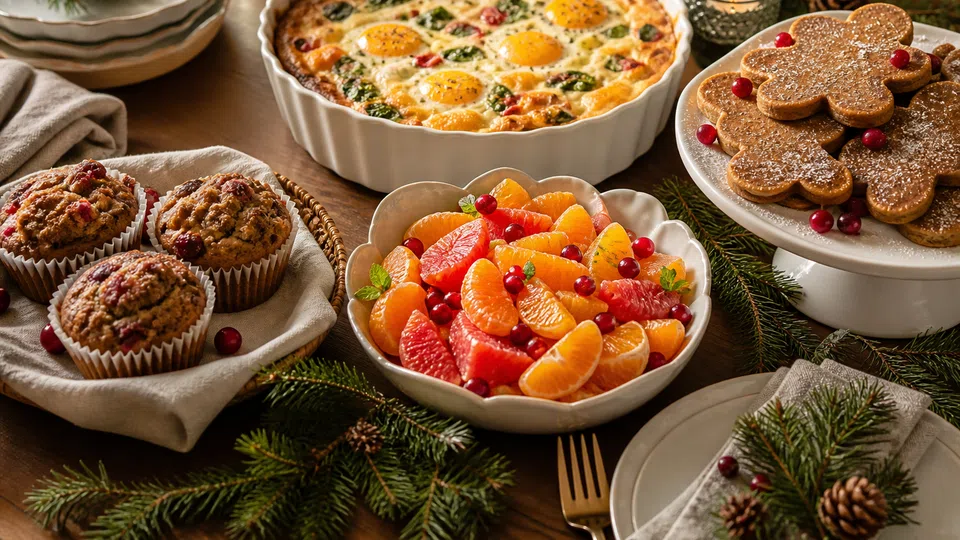
Easy Christmas brunch menu
An easy Christmas brunch menu is a service plan: choose one centerpiece that needs active cooking, add one fresh component, one simple bread or pancake, drinks, and an optional sweet only when the kitchen can absorb it. Start with the guest count and the stated yields of the tested recipes you choose; then check the oven, refrigerator, serving dishes, thermometer, and the people available to help. The host’s job is to sequence those parts, not to produce a catalogue of festive dishes. For more route context, visit Pancake World .

Build Christmas brunch around one active job
“Easy” is not the same as “few ingredients.” Three short recipes that all demand the only oven at 10:30 are harder than a longer menu made mostly from prepared components. The useful limit is simultaneous attention: one hot centerpiece, one person responsible for it, and everything else either cold, shelf-stable, or ready to warm without competing for the same heat source.
Brunch can be lighter and more informal than a roast-centered dinner. Keep the festive signal in one or two details—a spiced fruit bowl, cranberry relish, decorated cookies, or a special bread—rather than adding a holiday treatment to every component. This is editorial planning advice, not a claim about how a household should celebrate.
What this Christmas brunch plan owns
This page owns one low-stress Christmas-brunch workflow for a known group: guest count, yield-based quantities, shopping, kitchen capacity, make-ahead boundaries, service order, storage, and contingencies. It does not prescribe a universal Christmas tradition, promise that one menu suits every dietary need, or replace a tested recipe’s ingredients, yield, cooking directions, or storage instructions. Treat the menu combinations below as untested editorial planning examples.
Calculate batches from stated yield, not a made-up serving rule
Write each selected recipe’s stated yield and serving size beside the guest count. Divide the number of guests who will eat that component by the stated yield, round up to a whole batch, and then decide whether the equipment can cook or hold those batches. This is a planning calculation, not permission to multiply an unfamiliar baking formula. University of Minnesota Extension notes that small recipes can become out of proportion when multiplied, especially baked goods and foods thickened with starch.
| Selected component | Recipe’s stated yield | Guests eating it | Batches to plan | Decision before shopping |
|---|---|---|---|---|
| Tested savory centerpiece | Copy the recipe’s yield and serving size | Count confirmed eaters | Guests ÷ stated yield, rounded up | Can the chosen pan and oven handle the batches? |
| Tested bread or pancake recipe | Copy the printed yield | Count likely eaters | Use whole batches unless the recipe supports scaling | Can one pan or griddle finish service without a queue? |
| Fruit or packaged component | Use package or recipe information | Count eaters who want it | Buy only the planned amount plus a clear reserve | Where will unopened and opened food be stored? |
| Optional sweet | Use the product or recipe yield | Count guests after the main menu is set | Omit it if it creates extra cooking or storage | Does it add a new task or merely a small finish? |
For example, if a chosen tested casserole states that it yields 8 servings and 12 guests will eat it, plan 2 full batches unless the source gives a supported scale-up method. If 2 batches cannot fit the pan, oven, refrigerator, or service window, change the centerpiece or the menu pattern. Do not stretch raw egg, meat, or baking mixtures by intuition.
Build the shopping list by storage zone
Make five short lists rather than one long grocery run:shelf-stable bread, drinks, and paper goods; refrigerated eggs, dairy, plant alternatives, and cut produce; frozen items; whole produce; and service supplies. Add nonfood needs beside the food: foil, clean serving spoons, ice, labels, shallow leftover containers, and a working food thermometer. This exposes the refrigerator and freezer load before checkout and prevents the common mistake of planning food with nowhere safe to put it.
Shop shelf-stable items early and delicate produce nearer the date.Keep one flexible shelf-stable addition, such as crackers or an unopened loaf, for a surprise guest instead of preparing a second perishable casserole. If attendance grows, expand drinks, bread, and fruit first. A menu does not become safer or easier when its raw centerpiece is diluted past the tested formula.
For a smaller household, plan brunch for asmall group rather than turning a crowd-sized plan into a set of awkward fractions. The broaderEasy Easter brunch recipes is useful when the meal category itself, rather than Christmas-morning execution, is the question.
Audit the kitchen before the menu is final
-
Heat: list every dish that needs the oven, stovetop, griddle, toaster, or warmer, including its start and finish window. If the casserole occupies the oven, choose bread that is already baked, can warm after it comes out, or does not need the oven.
-
Cold storage: reserve refrigerator space for assembled perishable dishes, cut fruit, cold drinks, and food waiting to be served. If space is tight, choose whole fruit and shelf-stable bread rather than several chilled salads.
-
Serving: assign each item a bowl, platter, utensil, and a place on the table. Keep reserve portions refrigerated until they are needed rather than putting every perishable dish out as decoration.
-
Attention: name the person who watches the centerpiece, the person who makes drinks, and the person who refreshes cold trays. If there is one cook, make drinks self-serve and omit a second hot task.
-
Measurement: locate the thermometer before cooking, and use the selected recipe’s directions for its endpoint. A casserole’s color is not a substitute for the source-directed temperature check.
| Capacity zone | Write down | Conflict that changes the menu | Lower-stress response |
|---|---|---|---|
| Oven and griddle | Pan size, rack position, temperature, and active minutes for every hot item | Two items need the same appliance during the same finish window | Keep one active centerpiece; buy ready-to-serve bread or remove the second hot item. |
| Refrigerator | Shelf space for the assembled centerpiece, drinks, prepared fruit, and reserve trays | The planned dishes cannot all stay cold before their turn at the table | Use more whole fruit and shelf-stable components, or reduce the number of chilled dishes. |
| Counter and serving | A clean preparation area, landing space, serving dish, and utensil for each menu part | Ready-to-eat food crosses the active cooking area or a hot pan has nowhere to land | Assign one home to every item and stage nonfood supplies away from food preparation. |
| People and attention | The named person responsible for the centerpiece, drinks, and tray replenishment | One cook is expected to watch two active dishes or answer every service question | Make drinks self-serve, label the service map, and remove an active task. |
Two recipes can both look easy on paper and still be impossible together. A warm pastry that needs the oven in the casserole’s final half hour, pancakes that require the only cook while coffee needs attention, or three chilled salads without refrigerator space are conflicts to solve before food is bought. Remove a conflict; do not try to “work faster” around it.
Turn the capacity audit into a service map
Write the menu on a sheet with four columns: item, where it lives before service, where it is finished, and who moves it. “Fruit” is not enough; write “whole oranges in the refrigerator drawer, cut with the clean fruit board after the casserole goes in, placed in the first bowl by the table helper.” This level of detail sounds ordinary, but it finds the missing bowl, knife, shelf, or pair of hands before guests arrive.
Give each item one home at a time. An assembled casserole is in the refrigerator, then the oven, then its serving dish; it should not also be expected to share counter space with bread, a coffee maker, and a fruit board. A cold reserve is in the refrigerator until a clean serving dish is ready. Cups and beverages have their own station so a guest can refill a drink without crossing the cooking path. If the route from refrigerator to table passes through the active cooking area, put the next tray out before the cook needs that space.
Assess the oven by usable shelves and dish shape, not by wishful capacity. A large casserole dish can block another pan even when there is technically a rack above it. Check whether the centerpiece needs a particular rack position, whether bread has a compatible warming window, and whether the oven can be opened without disrupting a temperature-sensitive recipe. If the answer is uncertain, choose purchased room-temperature bread or a menu that uses the griddle as its only active heat source. The lower-stress choice is the one with a clear path, not the one with the most menu parts.
Refrigerator capacity deserves the same concrete review. Make a shelf map for cold drinks, the centerpiece, prepared fruit, dairy or plant alternatives, and reserve trays. Remove nonessential containers in advance. A shallow dish can take more shelf area than its ingredient list suggests, and a large bowl of cut fruit can become an obstacle when the time comes to replenish it. Whole fruit and sealed shelf-stable supplies are often the simplest answer when cold space is the limiting resource. This is a menu decision, not a cue to hold a perishable food on the counter.
Counter space is the final hidden constraint. Reserve a clean area for ready-to-eat food, another for the active recipe, and one small landing spot for plated items. Keep raw-food preparation separate from the fruit board and serving utensils. The purpose is not to build a professional kitchen at home; it is to avoid the moment when a hot casserole needs a landing place and the only clear surface is covered with toppings, paperwork, or a cold platter.
For a group that includes children or guests with simpler preferences, make one component plain and place strong sauces, herbs, and crunchy additions on the side. That choice is a service strategy: the host can serve a familiar base without producing a separate menu. For vegetarian guests, a vegetable or bean centerpiece can be the plan when it matches the selected recipe and the group’s needs. For any restriction, the ingredient list and cross-contact plan—not an attractive menu label—determine what can be offered with confidence.
For a mixed group, make the table modular: a savory bake with toppings on the side, fruit, one plain starch, and one optional sweet. Guests can build a plate without the host making separate entrées. Ask about allergies before finalizing the menu, read relevant product labels, use separate serving utensils where needed, and do not call a shared dish safe for a person whose cross-contact needs cannot be controlled. If a vegan menu is the central requirement, choose a vegan breakfast framework instead of treating a token substitute as a complete plan.
Color and texture are useful editorial checks, too. Casserole, potatoes, bread, and pastry can make a table feel heavy without adding another cooked dish. Whole fruit, a crisp vegetable component, or a small fruit bowl brings contrast with little new work. A berry-centered menu needs its own balance; build a berry-led brunch if fruit is meant to carry the theme.
Use regional breads, preserves, cheeses, vegetables, or breakfast meats when they are reliably available and fit the selected plan. A seasonal table does not need the greatest number of branded holiday products or imported “festive” ingredients. The useful test is operational: does the familiar local item replace a task, travel well from shop to table, and make sense for the household? Pancakes are one possible centerpiece, never a requirement that adds another pan to an already busy service plan.
Move logistics early; leave food-specific decisions with the recipe
Two days ahead, confirm the guest count, the selected tested recipes, the yield calculation, and the kitchen inventory. Clear refrigerator space, check the pan, locate the thermometer, count serving utensils, and decide where cold trays and reserve food will sit. If a frozen component is part of a selected recipe, follow that recipe and its food-safety directions rather than assuming every frozen item uses the same thawing or cooking schedule.
One day ahead, complete the work that does not create a holding problem: set the table, label serving dishes, make a shopping and service note, group sealed shelf-stable supplies, prepare drink supplies, and make cookies or a sauce only when its source permits the make-ahead step. Assemble a casserole only when the exact tested instructions allow it. Penn State Extension’s casserole guidance says to thaw casseroles in the refrigerator overnight, cook according to the recipe, and use a clean thermometer to ensure a casserole reaches 165°F; that narrow guidance does not make 165°F a universal endpoint for every brunch dish.
On Christmas morning, start with the centerpiece’s actual recipe timing. Keep cold components refrigerated until service when needed, prepare fruit with clean tools close to service, warm bread only if it does not displace the centerpiece, and set drinks up so they do not require a second cook. The purpose of advance work is to remove decisions, not to leave a completed perishable table waiting at room temperature.
| When | Host action | Food boundary | What can wait |
|---|---|---|---|
| Two days ahead | Confirm guests, recipes, capacity, serving pieces, and shopping zones. | Use recipe-specific thawing and storage directions. | Decorations and table decisions. |
| One day ahead | Set the table, stage supplies, and complete only source-permitted make-ahead food. | Keep perishable assembled food refrigerated. | Sealed drinks, napkins, and labels. |
| Recipe start time | Begin the centerpiece exactly when its directions require; assign one person to it. | Use the selected recipe’s time and temperature directions. | Nonessential garnish and optional sweet service. |
| About 45 minutes before arrival | Prepare serving utensils, drinks, and the first fruit or cold tray. | Keep reserve cold food chilled. | Extra platters and decorative rearranging. |
| About 20 minutes before arrival | Warm bread if capacity allows; brew coffee; clear the counter for plating. | Do not start another competing hot recipe. | Any optional warm pastry. |
| Service | Verify the selected casserole’s source-directed endpoint, then serve the first small trays. | Track time and replenish from chilled reserve. | All remaining reserve food. |
-
Finish the two-day and day-before capacity work before assigning any Christmas-morning start time.
-
Anchor the morning to the tested centerpiece recipe, then place drinks, fruit, bread, and table setup into gaps that do not compete with it.
-
At service, verify the source-directed endpoint, put out the first small trays, and keep cold reserve refrigerated for replenishment.
-
After service, note the time, separate dish-specific leftovers, and move eligible perishables into shallow containers within the applicable safe window.
The clock labels are an editable service example, not universal cooking times. A casserole may need a different start time, rest, or temperature check; pancakes may need batches begun only after guests are ready. If the centerpiece is late, serve drinks and fruit rather than raising oven heat beyond recipe directions. If pancakes are the active centerpiece, begin with a small batch and keep the rest of the meal ready so the first guests can eat while later pancakes cook.
USDA buffet guidance supports the safety boundary around this workflow: hold hot foods at 140°F or warmer and cold foods at 40°F or colder; do not leave food at room temperature for more than two hours, or more than one hour above 90°F. Use small trays and replace them rather than topping up an old serving dish. Those controls are about holding, not an invitation to make every component early.
Make the service order legible to everyone helping
-
Start the centerpiece path. Preheat the appliance required by the selected recipe, take out the pan when the recipe directs, or arrange the griddle station. Decorative finishing tasks stay at the bottom of the sheet because they are the first tasks to remove when the centerpiece needs attention.
-
Open the parallel service lane. Start coffee, put out cups, place clean utensils beside their assigned dishes, and set the first cold serving bowl only when those actions create no safety or equipment conflict.
-
Write every handoff. For example: “When the casserole goes into the oven, Alex fills the drink station; at the recipe’s final check, Sam cuts fruit with the clean fruit tools; after the measured endpoint and any source-directed rest, Alex carries the casserole to the serving dish.” Names can be replaced with “host” and “helper,” but the handoff should be explicit.
-
Arrange the table in guest order. Drinks and cups come first, followed by plates and napkins, then the centerpiece, bread or pancake area, fruit, and condiments. Keep cold reserve trays in the refrigerator and put a serving utensil with each food before it goes out.
-
Replenish and reset. Bring out a clean small dish from safe reserve rather than topping up an old one; then clear preparation tools from the table path and create space for the leftover-storage step.
If people arrive in waves, do not try to keep every hot item at peak quality for the whole arrival window. Choose a menu pattern that permits individual portions or a clearly managed hot centerpiece, and keep the simple components ready. When guests arrive together, the plan can favor a single large bake or a first pancake batch that goes directly to the table. Arrival pattern is a core input, just like oven capacity. It determines whether a dish should be cooked once, served in batches, or replaced by a cold component.
Make a small “stop list” at the end of the timeline: do not begin a warm pastry if the casserole is behind; do not set all cold dishes out at once; do not open a new topping unless it serves the chosen menu; do not start a second hot recipe while the first still needs attention. A stop list is useful because it protects a busy host from adding work in response to an empty-looking counter. Guests experience a calm, focused table more positively than a crowded table whose main dish is late.
Finally, schedule the reset. Once guests have taken the first servings, one person checks that the reserve remains cold, clears preparation tools away from the table path, and starts grouping leftovers only after food has finished service. That reset is part of the workflow, not cleanup after the “real” work. It creates space for conversation and makes the end-of-meal storage decision quicker, more visible, and less likely to be postponed.
Before bed on the day before, read the final sheet aloud from top to bottom. It should answer five practical questions without sending anyone back to a recipe search: who is expected, which tested recipe is the centerpiece, where every cold item fits, which appliance is occupied when, and what will be removed first if the morning changes. If a line has no owner or no storage location, resolve it then. This review is deliberately modest; it is not a second planning system, only a last chance to make the chosen system usable.
Keep a short contingency board, not a second menu
Keep a short contingency board, not a second menu is the fallback boundary; use the conditions below to decide whether to switch plans.
- The centerpiece runs late.
- Serve drinks, fruit, and bread that is ready; keep the centerpiece on its tested path. Do not raise heat or shorten a required step just to match the table clock.
- The oven fails.
- Abandon a raw casserole plan rather than partially cooking it. Use foods that can be served safely without the oven, and keep perishable replacements under their own directions.
- Guests arrive late.
- Keep cold components refrigerated and delay hot preparation where the selected recipe permits. Do not hold a whole meal warm for hours to preserve an original schedule.
- More guests appear.
- Expand unopened bread, whole fruit, drinks, or another shelf-stable addition. Do not stretch raw mixtures or claim a smaller recipe will feed a larger group.
- Cold storage is limited.
- Serve whole fruit, sealed shelf-stable items, and one chilled component; leave reserve food in the refrigerator until needed. Reduce the menu rather than inventing counter storage.
- An allergy is reported late.
- Do not relabel a shared dish as safe. Offer an unopened verified product or a separately prepared simple plate only when cross-contact can actually be controlled.
Think of the contingency board as a way to protect the main plan. It should not generate an extra casserole, a backup pancake bar, and a second set of bowls. A low-stress menu has a flexible shelf-stable reserve and one clear simplification move: remove the optional sweet, the warm bread, or the extra garnish before it compromises the centerpiece.
When the central problem is obtaining a tested dish rather than organizing service, explore make-ahead brunch ideas. That route can help with recipe-specific make-ahead choices; this page keeps the focus on guest count, capacity, sequencing, and a calm Christmas-morning handoff.
Serve in small rounds and give leftovers a separate plan
Put out only the first small fruit and chilled trays, then replenish from reserve that has stayed refrigerated. Keep hot and cold foods within their applicable holding conditions, and note when the first perishable dishes reach the table. Separate serving utensils help guests and make replenishment cleaner. Never top off an old dish with fresh food; replace the dish instead.
After the meal, do not use one storage rule for casserole, cut fruit, and dry cookies. Follow the selected recipe, product label, or specific safety guidance for each food. For perishable leftovers that are eligible to keep, divide larger amounts into shallow containers so they cool faster, label the contents and date, and refrigerate within the safe window. If food has been left at room temperature beyond the applicable limit, do not try to rescue it by refrigeration.
Put clean containers and labels beside the refrigerator before guests arrive. That small choice changes leftovers from an afterthought into a visible final task. It also prevents the host from searching for containers while the food is still waiting on the table.
Christmas brunch: the final run-through
- Confirm guest count, arrival time, allergies, and dietary restrictions.
- Choose one centerpiece and assign it the oven or griddle.
- Add one fresh component and one simple starch; add an optional sweet only when it creates no equipment conflict.
- Copy each selected tested recipe’s yield, calculate whole batches, and reject a plan the kitchen cannot cook or store.
- List every dish by refrigerator, oven, stovetop, griddle, or no-cook requirement.
- Shop by storage zone and include serving utensils, a thermometer, ice, labels, and shallow leftover containers.
- Set tableware, drink supplies, and the service sequence the day before; assemble food early only when its exact instructions allow it.
- Keep raw and assembled perishable dishes refrigerated promptly and cook the selected casserole to its source-directed endpoint.
- Serve from small dishes, track time for perishables, replenish from safe reserve, and never top off an old serving dish.
- Use the contingency board to simplify rather than adding a second hot menu.
- Pack eligible leftovers in shallow containers within the applicable safe window and keep dish-specific storage directions with them.
The completed plan should fit on one page: a chosen centerpiece, the recipe yields, equipment assignments, a short shopping list, the service timeline, and the simplification move. If it needs a second cook, a second oven, or more refrigerator space than exists, it is not yet the easy menu.
Sources and editorial references
Penn State Extension, “Make-Ahead Freezer Meals to the Rescue” — casserole thawing, recipe-directed cooking, and thermometer guidance. https://extension.psu.edu/make-ahead-freezer-meals-to-the-rescue
USDA Food Safety and Inspection Service, “How do I keep foods safe at a buffet?” — hot and cold holding, time limits, and replacing small trays. https://ask.fsis.usda.gov/article/How-do-I-keep-foods-safe-at-a-buffet
University of Minnesota Extension, “From prep to plate: Food safety tips for the holidays” — allergy questions, cross-contact controls, small-portion service, and leftovers. https://extension.umn.edu/about/our-stories/news/food-safety-tips-for-the-holidays
University of Minnesota Extension, “Planning the quantity food occasion” — recipe yield, serving size, equipment, space, and menu planning. https://extension.umn.edu/food/preparing/cooking-at-home/cooking-safely-for-a-crowd/planning-the-quantity-food-occasion
Evidence checked 28 August 2026. Menu combinations are editorial planning options; use tested recipes and current product instructions for actual quantities and cook times.