Brunch sliders
At Pancakes World, brunch sliders are small filled rolls designed for easy breakfast or lunch service. Build them with one cooked filling, one cheese or creamy element if desired, and one bright or crisp element added at the right time. Ham-and-egg, sausage-and-pepper, roasted-vegetable, and bean-patty versions all work when the fillings are fully cooked and the rolls are protected from excess moisture. For a group, assemble one tray, bake or warm it from a tested recipe, verify meat or egg temperatures, and serve in small batches rather than leaving the entire tray out.
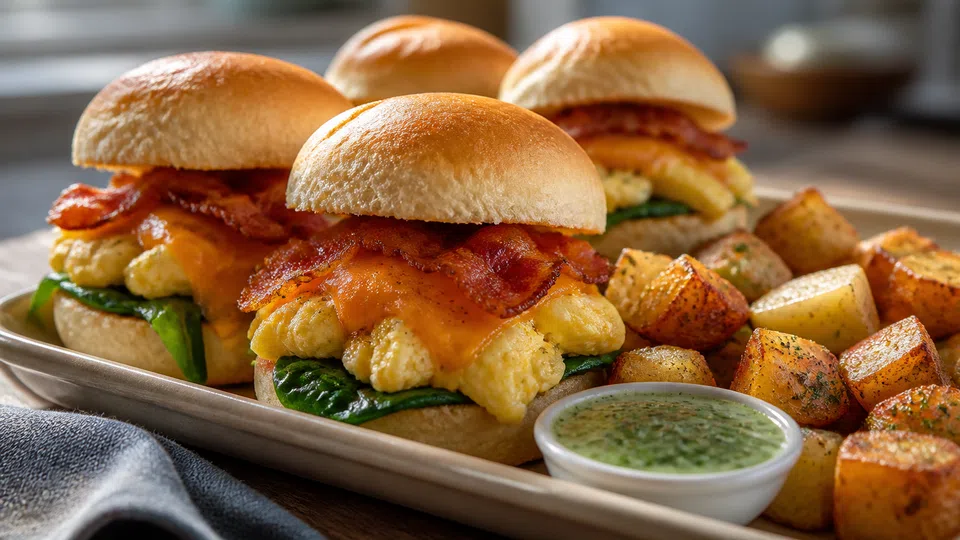
Direct answer for brunch sliders
The simplest method is to split attached dinner rolls horizontally, layer a modest amount of cooked filling, replace the tops, and warm the tray according to a tested slider recipe. Keep wet sauces thin and place watery vegetables or cold greens after heating. If using ham, sausage, poultry, eggs, or leftovers, follow the product-specific safe-temperature guidance. USDA lists 160°F for ground beef and pork, 165°F for ground poultry and casseroles, and 165°F for reheated leftovers.
Do not copy a time and temperature from an unrelated slider because roll size, filling temperature, pan material, and density change the result. The center, not just the browned top, must be appropriately hot.
What the term means
A slider is a small sandwich, not a nutritionally standardized portion. “Brunch” describes the filling and service context. The term does not guarantee a particular roll count, meat amount, calorie value, or origin story.
This page is a decision and assembly guide. It does not claim that one filling is best, reproduce a branded recipe, or invent product performance. Packaged rolls, deli meat, cheese, and sauces must be checked on their current labels for allergens and storage.
For the meal beyond the hand-held centerpiece, use the Brunch at Mr. Pancake Munich: A Focused Guide.
Practical options and examples
| Filling | Flavor balance | Moisture control | Safety focus |
|---|---|---|---|
| Ham, egg, cheese | Mustard or herbs | Use cooked egg; thin sauce | Ham label and egg temperature |
| Sausage, pepper, onion | Sharp relish | Drain cooked filling | Ground-meat temperature |
| Turkey, cranberry | Tart relish | Spread lightly | Poultry/leftover reheating |
| Roasted vegetables, cheese | Herbs or pesto | Drain vegetables | Cheese storage and allergens |
| Bean patty, slaw | Acidic slaw | Add slaw after heating | Keep cold topping cold |
| Mushroom, egg | Pepper and herbs | Cook off mushroom liquid | Egg dish doneness |
Choosing the right approach
Choose a hot-assembled slider when the venue has an oven and guests arrive together. Choose cold sandwiches only when ingredients can stay under cold control. For an open house, warm half the sliders first and hold the second tray refrigerated until its scheduled bake.
Three scenarios:
- Family brunch: ham, cooked egg, and cheese sliders with fruit. Assemble close to heating.
- Graduation open house: sausage-pepper sliders in two trays, vegetable sticks, and cookies. Replenish once.
- Vegetarian table: roasted mushroom and cheese sliders plus a separate bean-and-slaw version, clearly labeled.
Common mistakes
Overfilling makes the center dense and the bottom soggy. A thick layer of sauce soaks the bread. Wet spinach, tomato, or slaw added before baking releases more moisture. Hot sliders covered tightly for a long time steam and soften.
Do not assemble with warm filling and leave the tray on the counter for later. Cool or cook components under safe procedures and follow the tested formula. Do not use the same cutting board for raw sausage and rolls. Avoid guessing that deli meat is automatically ready for every use; read the package.
Step-by-step checklist
- Choose hot or cold service and confirm holding equipment.
- Select one filling with a verified cooking method.
- Read labels for allergens, raw/ready status, and storage.
- Cook raw meat separately to its safe internal temperature.
- Drain greasy or watery fillings.
- Split rolls evenly without compressing them.
- Apply sauce sparingly and away from the bottom edge.
- Layer filling evenly so each slider receives some.
- Heat using a tested recipe for the pan and filling.
- Verify the center where temperature control is required.
- Add cold crisp components after heating.
- Cut, serve in small batches, and refrigerate leftovers promptly.
Variations by ingredient
Hawaiian-style sweet rolls add sugar and brown readily; plain dinner rolls make a less sweet base. Gluten-free rolls vary significantly in structure, so use a formula developed for them. Cheese can protect bread from moisture, but it introduces dairy and does not fix a wet filling.
For meat decisions, use brunch meat dishes. For a reception, graduation brunch ideas or wedding brunch menu ideas covers service scale. For a small table, brunch ideas for small group prevents a whole catering tray from becoming leftovers.
Pancakes World includes sliders because brunch spans more than pancakes; this remains a food and media platform, not a restaurant menu.
Storage or planning notes
Prepare cooked filling in advance only when it can be cooled rapidly and refrigerated. Store rolls dry and fillings separately. Assemble close to heating for the strongest texture. Do not thaw or hold meat at room temperature.
USDA says leftovers should be refrigerated within two hours, stored in shallow containers for rapid cooling, kept three to four days in the refrigerator, and reheated to 165°F. A slider with cold slaw may be better disassembled before reheating.
For buffet service, USDA advises hot food at 140°F or warmer and cold food at 40°F or colder. Use small trays and do not add new sliders to an old tray.
A tray design that works
Use a roll grid that matches the pan without crushing. Spread filling to the edges so corner sliders are not empty. Mark vegetarian or allergen-controlled sections with separate pans, not a parsley garnish that can move. Supply tongs and a clean plate for every buffet visit.
Serve sliders beside something crisp or fresh: fruit, a vegetable salad, or pickles. Adding pancakes, potatoes, muffins, and cookies to the same plate creates unnecessary starch repetition.
Control moisture at every layer
Rolls soften from wet fillings, steam, and long covered holding. Drain cooked sausage, mushrooms, or roasted vegetables before assembly. Use only the sauce quantity supported by the recipe. Place cheese or another appropriate barrier next to the cut bread when desired, but remember that cheese brings dairy and salt and cannot compensate for a dripping filling.
Cold tomato, slaw, herbs, and lettuce generally retain better texture when added after heating. If guests assemble those toppings themselves, give each a dedicated utensil and keep perishable bowls cold. Do not return a topping bowl from the buffet to clean reserve stock.
Portion and cut cleanly
Keep an attached slab of rolls together for assembly when the recipe uses that method. Mark the final grid before baking so portions are equal, then cut after the stated rest. Use a long serrated knife for bread and a clean board. Avoid pressing down, which compresses the crumb and pushes filling out.
For individually shaped rolls, weigh or select similar sizes so the heating is even. A tray mixing very small and very large sliders can have cold centers and dry edges at the same time.
Compare hot and cold service
Hot sliders suit cheese, cooked egg, sausage, ham, and roasted vegetables but require an oven, temperature verification, and a short quality window. Cold sliders suit some deli, cucumber, herb, or salad fillings but require continuous cold control. Neither is automatically easier; choose based on the venue.
At a picnic or graduation, cold transport may be more reliable than carrying a hot tray. At home with guests arriving together, a hot tray can go directly to the table. At an open house, schedule two smaller trays rather than warming everything once.
Allergen and dietary separation
Rolls commonly contain wheat and may contain milk, egg, sesame, or soy. Fillings introduce more allergens. Retain packages and make a written ingredient card. If preparing a gluten-free or vegan alternative, use a separate pan and tools; placing two special sliders in the corner of the main tray does not control cross-contact.
Make the alternative substantial and visually identifiable by its own label, not by a loose toothpick that can migrate. Verify that decorative picks are food-safe and remove them before serving young children where relevant.
Troubleshooting the finished tray
If bottoms are soggy, reduce filling moisture, assemble later, and confirm the pan and recipe. If tops brown before centers heat, cover only as the tested recipe directs and verify oven temperature. If the cheese leaks excessively, check amount and placement. If corner rolls are empty, spread filling all the way to the grid edges before replacing tops.
Do not fix a cold center by judging only the top color. Measure where required and return the tray to heat under the recipe method. Record roll brand, pan, filling temperature, and actual time for the next household batch; product sizes change.
Sources
- USDA FSIS — Safe Minimum Internal Temperature Chart — https://www.fsis.usda.gov/food-safety/safe-food-handling-and-preparation/food-safety-basics/safe-temperature-chart — meat, poultry, egg, casserole, and leftover temperatures.
- USDA FSIS — Hams and Food Safety — https://www.fsis.usda.gov/food-safety/safe-food-handling-and-preparation/meat-catfish/hams-and-food-safety — ham product distinctions and reheating.
- USDA FSIS — Leftovers and Food Safety — https://www.fsis.usda.gov/food-safety/safe-food-handling-and-preparation/food-safety-basics/leftovers-and-food-safety — cooling, storage, and reheating.
Evidence checked 16 August 2026. Use a tested recipe for actual roll count, pan, time, and temperature.