
Quick answer: a rice cooker can make a thick pancake, but the model decides the method
A rice-cooker pancake is a deep, round cake made by cooking pancake batter in the appliance’s removable bowl. It can produce a golden curved base and a soft, sliceable center without flipping individual cakes. The idea is often presented online as a Japanese pancake trend, but it is better understood as a modern appliance method than as an ancient national tradition.
Not every rice cooker is designed to bake batter. Some models have a cake program; others permit only rice and listed dishes. A standard rice cycle may stop early, repeat unpredictably, or conflict with the manual. Check the manufacturer’s instructions before adding batter. Never block a vent, defeat a lid mechanism, force repeated cycles against the manual, or use a damaged nonstick bowl.
Rice-cooker pancake versus soufflé pancake
These are different forms despite both being tall. A soufflé pancake is an individual griddle cake whose height usually depends on meringue and gentle covered cooking. A rice-cooker pancake is one large cake whose shape comes from the appliance bowl. It may use ordinary baking-powder batter and is cut into wedges.
| Feature | Rice-cooker pancake | Soufflé-style pancake |
|---|---|---|
| Shape | One large bowl-shaped round | Several individual tall rounds |
| Equipment | Compatible electric rice cooker | Skillet or griddle, often a lid or rings |
| Leavening | Recipe-specific; often baking powder | Often meringue plus recipe leavener |
| Turning | Usually inverted after cooking, not flipped mid-cycle | Individual cakes are carefully flipped |
| Serving | Sliced into wedges | Served as individual cakes or a stack |
Do not pour a delicate soufflé batter into a rice cooker unless that exact recipe was designed and tested for it. Depth, cooking time, retained moisture, and structural needs are different.
Check the appliance first
Find the model number and read the manual. Look for a cake, bake, mixed-cooking, or similar manufacturer-approved program. Confirm the maximum batch or fill guidance and whether the nonstick bowl may be greased. If the manual says not to cook batter, use another method.
The steam vent must remain clear. Batter can expand, so the bowl needs substantial headroom. Do not fill to a generic internet line that belongs to another machine. A three-cup cooker and a ten-cup cooker do not accept the same batter volume, and “cups” on rice appliances may refer to rice-measuring cups rather than standard kitchen cups.
Inspect the bowl coating. A scratched or peeling surface should be handled according to the manufacturer’s replacement advice, not covered with extra oil. Keep the exterior of the removable bowl clean and dry before placing it into the heating base.
Choose a suitable batter
Use a tested rice-cooker cake or pancake recipe written for a comparable appliance capacity. The batter should contain enough structure to set at depth. Ordinary thin crêpe batter is not a good candidate, while an extremely stiff batter may bake unevenly.
If adapting a familiar pancake formula, make only a small approved-capacity batch and record ingredients by weight. Avoid loading the first test with heavy fruit, chocolate, or wet fillings, which can sink and create a gummy layer. Once a plain version works, use variations from a tested recipe.
Mix dry and wet ingredients separately, then combine only until no large dry pockets remain. Overmixing can produce a tight crumb. Baking powder begins reacting once wet, so have the prepared bowl and selected program ready.
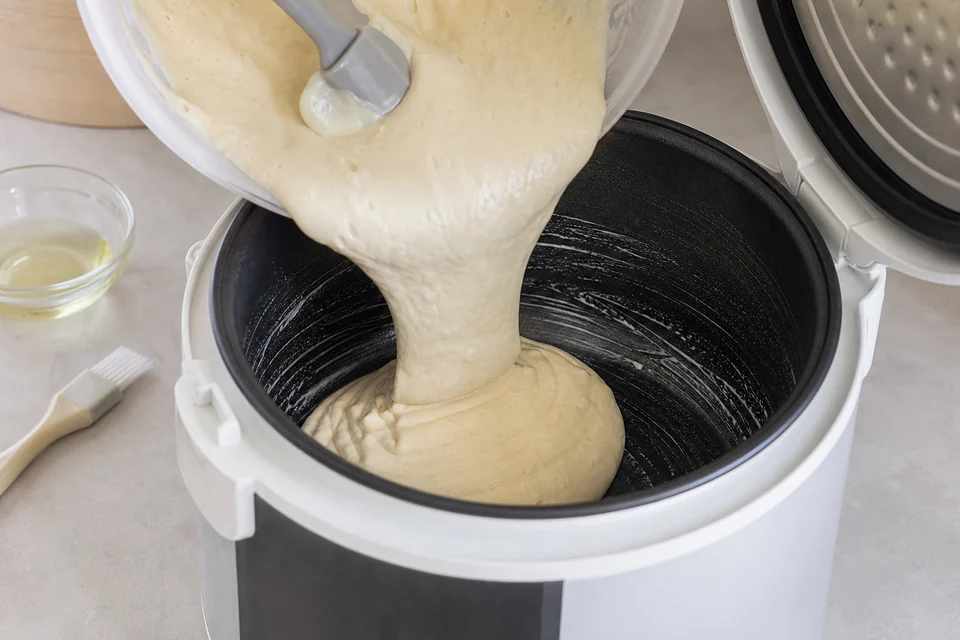
The generated image deliberately hides controls and brand identifiers. It illustrates batter transfer, not permission to use an unknown appliance.
Step-by-step method
- Read the manual and select a manufacturer-approved cake or baking setting.
- Measure a recipe sized for the cooker. Do not exceed the appliance or recipe fill limit.
- Prepare the bowl exactly as allowed. A light, even greasing may help release when the instructions permit it.
- Mix the batter gently and pour it into the bowl. Level the surface without striking the bowl against a counter.
- Wipe the outside of the bowl clean and dry, then seat it correctly in the cooker.
- Run the approved program. Keep the vent unobstructed and do not open the lid repeatedly.
- At program completion, test the center. A skewer should not carry wet batter, and the center should feel set rather than liquid.
- If the center is undercooked, follow the manual and recipe’s approved continuation method. Do not improvise endless cycles.
- Rest briefly if the recipe specifies it, loosen the edge with a coating-safe utensil, and invert onto a plate.
- Cut a central wedge and inspect the crumb before serving the rest.
Times cannot be universal because heating logic, bowl geometry, wattage, batch size, and program behavior differ.
Doneness and food safety
A browned base does not prove that a deep center is cooked. The critical check is the middle. Look for set crumb with no line of flowing batter. A clean or lightly crumbed skewer is useful when the recipe supports that test.
For an egg-rich cake, reliable temperature guidance may provide an additional food-safety check. USDA guidance lists 160°F / 71.1°C for egg dishes. Insert a clean food thermometer into the center without touching the bowl. Temperature supports safety; it does not guarantee a tender crumb. A cake can be safe yet overcooked and dry.
Do not taste raw batter. Raw flour and eggs can carry hazards, and licking the spoon is not a doneness test. Wash hands, bowls, and utensils after raw-batter contact.
Troubleshooting table
| Result | Likely area to inspect | Next safe step |
|---|---|---|
| Wet center, dark base | Batch too deep, program unsuitable, or heat concentrated at base | Stop using that batch size; choose a smaller tested recipe or approved cake program |
| Dense, rubbery crumb | Batter overmixed, leavener inactive, or formula too wet | Check leavener and mixing; do not add extra powder blindly |
| Cake will not release | Bowl preparation or coating condition | Cool only as directed, loosen with a safe utensil, inspect coating before next use |
| Pale top | Normal for enclosed bowl cooking | Invert for presentation; do not chase top browning with an unsafe extra cycle |
| Large tunnel or uneven crumb | Heavy additions sank or leavener was unevenly mixed | Test a plain batter and distribute dry ingredients thoroughly |
| Cooker switches off quickly | Sensor rejects the load or mode is incompatible | Stop and consult the manual; do not repeatedly override the cycle |
Repeated shutoff is an appliance signal, not a challenge to bypass.
Flavor variations and serving
Serve wedges with fresh fruit, a spoonful of yogurt, compote, or a small amount of syrup. The cake’s thickness makes a modest topping sufficient. Let diners add their own wet topping so leftovers do not become soggy.
Once a plain batter is reliable, variations can include citrus zest, vanilla, cinnamon, or a small amount of berries according to a tested recipe. Wet fruit changes moisture and can sink. Cocoa changes dry ingredients. Protein powder can make batter absorb differently. Each deserves a controlled test rather than being folded into the first batch.
For a savory version, use a recipe specifically designed for the purpose. Cheese, meat, and vegetables bring additional moisture and food-safety considerations. Do not scatter raw meat into sweet pancake batter and assume the appliance cycle will cook it evenly.
Cooling, storage, and reheating
Remove the pancake from the warm cooker after the recipe’s resting period. Extended keep-warm holding can dry the base while trapping moisture near the top. Cool wedges before packing so condensation does not make the crumb gummy.
Refrigerate or freeze according to the recipe and applicable leftover guidance. Freeze plain wedges separated for easy removal; add fresh toppings after reheating. A microwave can soften a slice quickly but may create hot spots, while a covered low oven or toaster oven can warm more evenly. Follow appliance-safe methods and check the center.
Do not store the cake in the rice-cooker bowl inside the unplugged appliance. The machine is not a refrigerator or a sealed food-storage container.
Common mistakes and limits
The most serious mistake is assuming every rice cooker can bake. The second is filling the bowl too high. The third is treating automatic shutoff as permission to force repeated cycles. Other errors include adding heavy wet fillings before the base method works, scratching the bowl with metal tools, and judging doneness by the golden bottom alone.
The label “Japanese rice-cooker pancake” describes the search question and modern cooking style; it does not prove one inventor or a historical tradition. Manufacturer guidance and a tested formula are more important than viral appearance.
Frequently asked questions
Can any rice cooker make a pancake?
No. Use only a model whose manual permits cake, baking, or a comparable batter preparation. When in doubt, contact the manufacturer.
Can I use boxed pancake mix?
Only with a recipe or manufacturer instruction sized for the cooker. Package griddle directions do not automatically apply at bowl depth.
Why is the top pale?
Heat is concentrated around the bowl, and the upper surface is not exposed like an oven cake. Inverting puts the browned base on top.
Do I need to flip the pancake?
Usually no. The cake cooks as one deep round and is inverted after it is fully set. Follow the model-specific recipe.
How full should the bowl be?
Use the limit in the tested recipe and appliance manual. Rice markings are not generic cake-fill lines.
Why did my cooker stop early?
Its sensor or program may not accept that load. Do not override it repeatedly. Consult the manual and use an approved setting or another cooking method.
How do I know the middle is cooked?
Check the central crumb, use a skewer, and where appropriate verify an egg-dish center reaches 160°F / 71.1°C. The base color alone is insufficient.
Can I keep it on the warm setting?
Only if the manufacturer and recipe support that holding period. Quality can decline, and keep-warm is not a substitute for proper cooling and storage.
Related Pancake World pages
Compare different Japanese pancake styles and learn why Japanese souffle pancakes deflate.
Sources and editorial references
- Zojirushi, Recipe Inspirations —
https://store.zojirushi.com/pages/recipe-inspirations - USDA Food Safety and Inspection Service, Safe Minimum Internal Temperature Chart —
https://www.fsis.usda.gov/food-safety/safe-food-handling-and-preparation/food-safety-basics/safe-temperature-chart
For more practical food and breakfast guides, visit Pancakes World.
For the wider topic, start with Japanese Pancakes.
For a closely related guide, see Monjayaki: The Tokyo Griddle Dish You Need to Try.
A useful next comparison is Making Japanese Pancake Batter.
You can also continue with Easy Okonomiyaki: Japanese Savory Pancakes at Home.
