Frozen breakfast sandwich air fryer
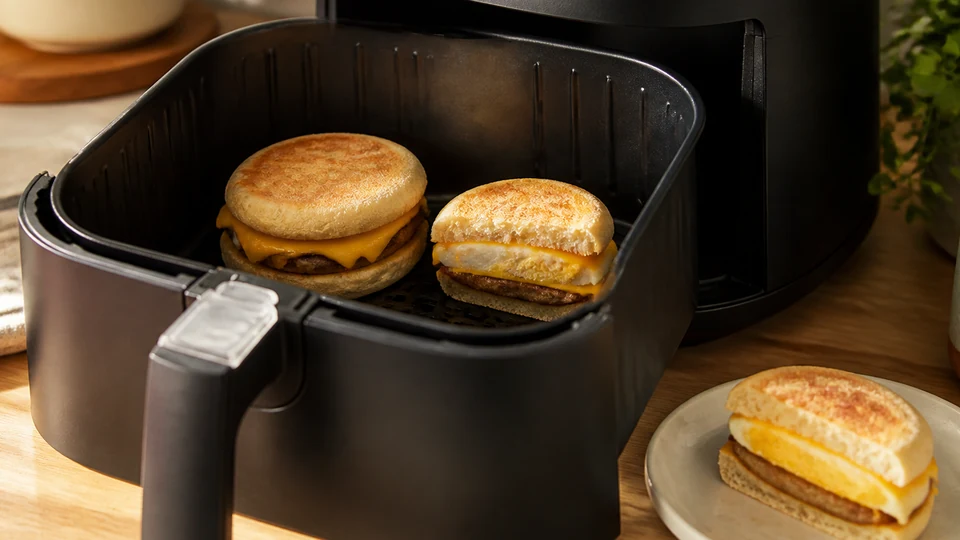
At Pancakes World, to air-fry a frozen breakfast sandwich, first confirm the package says it is fully cooked and does not prohibit air-fryer use. Remove all plastic, paperboard, and non-oven-safe wrapping. If the package gives air-fryer directions, follow them exactly. Without directions, use the test protocol below only for a fully cooked sandwich: separate the bread from the frozen egg-and-meat filling, heat the filling at 350°F, begin checking after five minutes, and continue in short intervals until several central spots reach 165°F. Add the bread for only the final few minutes so it crisps without burning. Air fryers vary, so record the successful settings for that exact product and appliance instead of treating one time as universal.
For broader context, continue with American Breakfast: Pancakes, Diner Plates and Brunch.
The label decides whether this method starts at all
A frozen breakfast sandwich may be:
- fully cooked and intended only for reheating
- partially cooked
- not ready to eat
- made with a raw meat, poultry, or egg component
- packed with microwave-only materials or directions
- tested by its manufacturer for oven, microwave, or air fryer use
These categories are not interchangeable. USDA warns that browned breading, grill marks, and a cooked-looking exterior do not prove that a frozen food is ready to eat. Look for language such as “fully cooked,” “ready to eat,” “cook and serve,” “ready to cook,” or “oven ready.” Read the preparation panel, not only the product name.
Use this decision rule:
- The package has air-fryer instructions: follow the stated temperature, configuration, time, turning, standing period, and endpoint.
- The product is fully cooked but has no air-fryer instructions: the adaptive reheating protocol below can be used as an editorial starting method, with a 165°F centre as the acceptance test.
- The product is raw, partially cooked, or not ready to eat and has no validated air-fryer directions: do not improvise. Use a method printed on the package.
- The label prohibits air frying or requires cooking in its original package: follow the manufacturer’s validated method rather than transferring the product.
USDA specifically says raw stuffed breaded chicken products should not be cooked in an air fryer unless an appropriate validated instruction applies. While that is not a typical breakfast sandwich, it illustrates why an appliance substitution can be unsafe for a raw frozen product.
Why one universal time is unreliable
Air fryers are compact convection ovens, but their size, wattage, basket geometry, heating element, fan pattern, preheat behaviour, and temperature calibration differ. The sandwich also varies:
- biscuit, croissant, bagel, English muffin, pancake, waffle, or flatbread exterior
- one thick frozen block or separable components
- sausage, bacon, ham, chicken, or plant-based filling
- cheese location and amount
- egg patty thickness
- product mass and starting temperature
- one sandwich versus a crowded batch
USDA gives general air-fryer context of roughly 350°F to 400°F and five to twenty-five minutes for a wide range of foods, not a validated breakfast-sandwich recipe. A search result that says “cook for eight minutes” may work for one product and fail another.
The fixed fact is the safe endpoint. For a fully cooked sandwich being reheated, take the centre to 165°F. For an egg dish containing meat or poultry, 165°F is also the conservative combination endpoint reflected in federal safety guidance.
Adaptive protocol for a fully cooked sandwich
This is a controlled household test method, not a manufacturer validation. Use it only after confirming the sandwich is fully cooked and air-fryer use is not prohibited.
Step 1: inspect and record
Write down:
- exact product and variety
- package status: fully cooked
- sandwich weight if listed
- bread type
- frozen components that can be separated
- air-fryer model and basket style
This record turns one successful result into a repeatable setting for the same product and appliance. It should not be generalized to another sandwich after a reformulation or size change.
Step 2: remove packaging
Remove plastic film, paperboard sleeve, absorbent pad, labels, and any wrapper not specifically rated for the air fryer. Do not assume microwave crisping sleeves, waxed paper, plastic wrap, or printed cardboard can withstand direct circulating heat.
If the product is frozen together with paper that will not release, do not tear fragments into the food. Use a package-approved thaw or cooking step, or select the validated preparation method.
Step 3: separate bread and filling when possible
Lift the top and bottom bread pieces away from the egg, cheese, and meat block. Separating solves the central problem: frozen protein needs more time than exposed bread.
If components are frozen solid, do not pry with force and send fragments across the kitchen. A very short package-approved microwave defrost may release them, but that becomes a hybrid method and the food should then be cooked immediately. If no safe separation method is available, use the whole-sandwich lane below.
Step 4: set 350°F as a conservative test point
Preheat if the appliance manual calls for it. Place the frozen filling in the basket in one layer. Avoid parchment or foil that blocks airflow unless the appliance manufacturer explicitly allows it and it is secured by food.
Start at 350°F. This temperature is within USDA’s general air-fryer range and gives the filling time to warm before bread burns. It is an editorial starting point, not an official product direction.
Step 5: begin checking at five minutes
At five minutes, open the fryer, turn the filling if its shape permits, and assess the centre with a clean instant-read thermometer. The food may still be far below 165°F. The purpose of the first check is to establish progress, not declare it done.
Continue in roughly two-minute intervals. Turn again if one surface browns much faster. A thick sausage-and-egg block may need several intervals; a thin bacon-and-egg filling may need fewer.
Step 6: add bread late
When the filling is hot but not yet at 165°F, place the bread cut-side up or down according to the desired crispness and basket space. Begin with a short final window. Bread can change from pale to over-browned quickly in moving hot air.
For a croissant, biscuit, or sweet bread, use even greater caution because exposed fat or sugar promotes browning. Bagel and English-muffin halves usually tolerate more direct heat, but exact time still varies.
Step 7: check multiple central spots
Remove the filling briefly to a clean heat-safe plate. Insert the thermometer from the side into the thickest part so the sensing area reaches the centre. Check the egg-and-meat interface and at least one other dense location.
The sandwich passes when all relevant central checks reach 165°F. Melted cheese, steam at the edge, browned bread, and a hot basket are not substitutes.
Step 8: reassemble and rest briefly
Reassemble the sandwich carefully. Cheese and filling can be very hot. A short rest lets heat distribute and reduces burn risk, but it does not replace the 165°F check.
Record the final total time, whether preheating was used, when bread entered, and any turn. Next time, use the record only if the product, quantity, and appliance are unchanged.
Whole-sandwich protocol
Some sandwiches cannot be separated. Use this only for a fully cooked product without a contrary package direction.
- Remove all unsafe packaging.
- Preheat if required by the appliance.
- Place one sandwich in the basket with space around it.
- Start at 325°F to 350°F to reduce early bread burning.
- Check at five minutes and turn the sandwich.
- If the bread is already brown while the centre is cold, lower the temperature and continue in short intervals.
- Check the centre from the side in multiple locations.
- Continue until 165°F throughout.
This lane is usually less controllable because the bread receives the entire heating period. If the exterior is done far before the centre, stop trying to solve the mismatch with higher heat. Use a hybrid method or the manufacturer’s microwave/oven instructions.
Hybrid microwave and air-fryer method
A hybrid method can heat the centre with a package-approved microwave step and crisp the bread briefly in the air fryer.
Use this order:
- Follow the package’s microwave thaw or heat instruction, including turning and standing time.
- Remove all microwave packaging before air frying.
- Separate the bread if possible.
- Air fry briefly at 350°F to crisp the exterior.
- Recheck the assembled centre for 165°F.
Do not shorten the package microwave step arbitrarily and assume the air fryer will compensate. The product manufacturer’s validated sequence remains the primary direction. The air fryer finish is for texture after safe heating, not a reason to ignore the centre.
Bread-by-bread decisions
Biscuit
Biscuits can dry at the cut edge while the outside browns. Heat the filling separately and add biscuit halves only near the end. If the biscuit seems dry, avoid spraying water into the fryer; reassemble with the hot filling and allow a brief rest.
Croissant
Croissants brown quickly because of their fat-rich layers. Use a lower temperature or very short finishing window. Watch continuously during the final stage.
English muffin
An English muffin can handle a crisp finish well. Place the cut faces where hot air reaches them, but do not let a light half move into the heating element.
Bagel
Bagels are dense and may shield the centre if the sandwich stays whole. Separate the filling. Toast bagel halves late, and check that the thicker bread has not remained cold next to the filling.
Pancake or waffle sandwich
These can contain sugar and brown rapidly. Warm filling first, then add the cakes only long enough to heat and lightly crisp. Do not assume a frozen waffle’s toaster directions apply to an assembled sandwich.
Flatbread or tortilla
Thin bread can lift in strong airflow. Keep it weighted by the filling and follow the air-fryer manual’s rules for liners or racks. Do not place an empty loose tortilla in the basket.
Filling decisions
Sausage patty
The patty is often the densest component. Check it from the side through the centre. If the product were raw rather than fully cooked, red-meat ground sausage requires 160°F and poultry sausage 165°F—but a raw frozen sandwich without validated air-fryer instructions should not use this generic protocol.
Bacon or ham
Thin meat may heat faster than the egg patty. Check the egg-and-cheese centre rather than only the meat edge. Fully cooked ham packaged in USDA-inspected plants has product-specific reheating guidance, but an assembled leftover-style sandwich is safest at 165°F throughout.
Chicken or turkey
Poultry must reach 165°F. Confirm the package status and do not rely on pre-browning. A fully cooked poultry patty is reheated; a raw one needs validated cooking directions.
Egg patty
Egg can remain cold in the centre while cheese melts around it. Probe the thickest egg area and the interface with meat. FDA/USDA guidance uses 160°F for egg dishes alone and 165°F for combinations containing meat or poultry and for leftovers.
Cheese
Cheese is not a thermometer. It may melt well below the safe centre temperature. Positioning cheese against the hot filling during final assembly often protects it from flying or dripping into the basket.
Plant-based patty
Read the label. Plant-based does not establish ready-to-eat status or a safe endpoint by itself. Follow manufacturer directions and check whether the product contains an egg component or other ingredients requiring thorough heating.
Airflow and batch size
USDA warns that overcrowding prevents adequate air circulation and can lead to uneven cooking. One sandwich is the best calibration batch.
For two sandwiches:
- keep space around each one
- avoid stacking
- swap positions halfway if the appliance has hot spots
- check each sandwich independently
- expect the total time to differ from the one-sandwich record
For a family batch, cook sequentially rather than filling every basket surface. Hold finished sandwiches safely hot only for a short controlled service, or serve in waves. Do not put a hot sandwich back into a contaminated wrapper.
Thermometer technique for a sandwich
A top-down probe can pass through a thin patty without placing the full sensing area in the centre. USDA recommends side insertion for thin foods such as sausage patties.
- Use tongs or a spatula to move the hot filling to a clean plate.
- Insert the probe horizontally from the side.
- Aim for the centre of the thickest component.
- Check the meat or plant patty and the egg centre.
- Avoid measuring only molten cheese or hot bread.
- Clean the probe before and after use.
If the filling is too thin for the thermometer’s sensing area, stack the component only if the thermometer manufacturer recommends that approach, or use a suitable thin-tip probe. Do not guess because the tool is awkward.
Troubleshooting
Bread burns before the centre is hot
Separate bread and filling, lower the temperature, or use a package-approved microwave step for the centre. Add bread only at the end.
Centre is still frozen after the bread is done
Remove bread. Continue heating the filling in short intervals, turning it and checking temperature. Next time, start with separated components or a hybrid method.
Cheese falls through the basket
Keep cheese against the filling, add it late, or use an accessory explicitly approved by the air-fryer manufacturer. Do not add loose foil that can contact the heating element.
Sandwich becomes dry
The total hot-air exposure was too long or the temperature too high. Heat the dense filling first, use a shorter bread finish, and record the new split timing.
One side browns faster
Turn the food and rotate its basket position. Air-fryer hot spots are common. For multiple sandwiches, swap front and back positions.
Temperature readings vary
That is evidence of uneven heating. Continue at a moderate setting, turn the filling, and test several locations. Acceptance requires the cold spots to reach 165°F.
Wrapper sticks to the frozen sandwich
Do not air fry the wrapper unless specifically approved. Use a package-authorized thaw step or prepare the product with its validated method.
Cleaning, storage, and leftovers
Wash hands before preparation. Clean the basket after it cools, paying attention to melted cheese and grease. Follow the appliance manual; some coated baskets can be damaged by abrasive tools.
If the sandwich is not eaten immediately, refrigerate it within two hours, or one hour above 90°F. Store in a clean covered container. Reheat only the amount needed and take the centre back to 165°F.
Do not refreeze a sandwich that sat at room temperature beyond the safe limit. A product that still contains ice crystals after a freezer power interruption may have different official guidance; consult FoodSafety.gov’s frozen-food chart rather than improvising.
Quick decision table
| Product state | Air-fryer directions present? | Decision |
|---|---|---|
| Fully cooked | Yes | Follow package exactly; verify endpoint |
| Fully cooked | No | Adaptive protocol allowed as an editorial test; reach 165°F |
| Raw or not ready to eat | Yes | Follow validated package direction exactly |
| Raw or not ready to eat | No | Do not improvise in air fryer |
| Wrapper unknown | Any | Remove unless explicitly air-fryer safe |
| Bread burns early | Any | Separate components or use hybrid method |
| Multiple sandwiches | Any | Avoid crowding; check each separately |
Frequently asked questions
How long does a frozen breakfast sandwich take in an air fryer?
There is no universal time. Product mass, bread, filling, appliance, preheat, and basket load vary. Follow package air-fryer directions. For a fully cooked sandwich without directions, start checking separated filling after five minutes at 350°F and continue in short intervals until 165°F.
What temperature should I use?
Use the package temperature when provided. For the editorial fully cooked protocol, 350°F is a conservative starting point; lower heat may protect delicate bread. The final centre temperature, not the dial alone, determines readiness.
Do I need to preheat the air fryer?
Follow the appliance manual and package. If your recorded successful method used preheating, repeat it. Changing preheat changes the timing.
Should I wrap the sandwich in foil?
Only if the air-fryer manufacturer permits foil, the package method calls for it, and the foil is secured so it cannot reach the heating element. Foil also reduces airflow and crispness. Separating components is usually more controllable.
Can I put the microwave wrapper in the air fryer?
No unless it is explicitly labelled for air-fryer or oven use at the required temperature. Remove plastic film, crisping sleeves, printed paperboard, and unknown wrappers.
Can I cook a raw frozen breakfast sandwich this way?
Only with validated package air-fryer directions. Do not apply a fully cooked reheating protocol to a raw or not-ready-to-eat product.
How do I stop the bread from burning?
Separate it from the filling, heat the filling first, and add bread in the final minutes. Lower temperature for croissants, biscuits, pancakes, or waffles.
Is melted cheese proof the sandwich is hot enough?
No. Cheese melts before a dense egg or meat centre necessarily reaches 165°F. Use a clean thermometer in multiple central locations.
Can I cook two sandwiches together?
Only if they fit without stacking or crowding. Expect a different time, rotate positions, and test both centres independently.
Can I reheat a previously cooked sandwich in the air fryer?
Yes, if it was cooled and stored safely. Reheat leftovers to 165°F throughout and refrigerate any perishable food within two hours of service.
Explore related Pancakes World guidance on American Pancakes, Maple Syrup, and Maple Syrup Pancakes.
Sources and editorial references
- USDA Food Safety and Inspection Service, Air Fryers and Food Safety:
https://www.fsis.usda.gov/food-safety/safe-food-handling-and-preparation/food-safety-basics/air-fryers-and-food-safety - USDA Food Safety and Inspection Service, Preparing Frozen Food:
https://www.fsis.usda.gov/news-events/news-press-releases/preparing-frozen-food - USDA Food Safety and Inspection Service, Safe Minimum Internal Temperature Chart:
https://www.fsis.usda.gov/food-safety/safe-food-handling-and-preparation/food-safety-basics/safe-temperature-chart - USDA Food Safety and Inspection Service, Food Thermometers:
https://www.fsis.usda.gov/food-safety/safe-food-handling-and-preparation/food-safety-basics/food-thermometers - USDA Food Safety and Inspection Service, How Do I Reheat Leftovers Safely?:
https://ask.fsis.usda.gov/article/How-do-I-reheat-leftovers-safely - FoodSafety.gov, Salmonella and Food:
https://www.foodsafety.gov/blog/salmonella-and-food